Virtual Machines
Realms
The Realms are the hypervisors of a specific type of computer software that is used to create and run virtual machines. Realms can only be managed in the configuration files.
Users can view the Realms that exist in the system through the Realms tab in management. Associated to each Realm is a Driver. The purpose of this driver is so the backend of the system knows HOW to communicate to the infrastructure.
Users of tiCrypt cannot create their own realms. The realms section of the management tab is just to see which realms and drivers exist in the system.
Realms do not connect to other realms.
The actions that can be done in this tab are as follow.
| Action | Notes |
|---|---|
| Fix VMs | A user sync up all of the current VMs. |
| Fix drives | A user can sync up all of current drives. |
| View Config | Super Admins can view the backend configuration of the Libvirt Realm. |
About every hour, the backend of the system syncs up what is in the database and what is known to libvirt to actually be running. If a user would not like to wait and would like to do it manually they can do so by selecting fix VMs and/or fix drives.
Only the Super-Admin role is able to use the view config option in realms.
Libvirt Hosts
The Hosts are the servers that host the virtual machines, or where the virtual machines live. These servers are physical and actually exist somewhere. These hosts are the "home" of the realms, which is the software that creates and run the VMs. Each of these realms consists of servers and other components.
A Host can be added by selecting the Register New Libvirt Host button located at the top right side. A modal will appear that prompts the user to select:
- The Realm
- Name of the Host
- URI (Uniform Resource Identifier)
- The Hardware Profile
- State of the Hardware
You can select a static address translation by checking:
- Use static address translation.
This option allows you to input NAT settings such as IPv4 address and an NAT Port base.
A Host has the following actions.
| Action | Notes |
|---|---|
| Shut down | A user can shut down a host. |
| Delete | A user can delete a host. |
| Edit | A user can edit the basic information about a host such as the name. |
| Change State | A user can change between three states of the host. |
| Check utilization | A user can check the resources that have been used up in the host. |
When a host is Shut down, all running VMs, service VMs and data-in VMs of the host(s) will be shut down, which may cause all non-persistent data to be lost.
Hosts can be in three different states as follows:
Enabled: tiCrypt can interact with the host and schedule VMs on it.
No scheduler: tiCrypt can interact with the host however, it cannot schedule VMs on it.
Disabled: tiCrypt cannot interact with the host nor can it schedule VMs on it
The reason for change state option is to allow a flexible architecture of the Libvirt hosts over Virtual Machines.
The Check utilization option serves various resource management purposes and has the following quotas:
- Name of the host
- Realm ID
- Current number of active VMs out of the total VMs
- Current number of cores out of the total cores
- Current memory out of the total available memory
- Current number of devices out of the total available devices
Hardware Profiles
The Hardware profiles define the specific VM hosts on the system. These are necessary to transfer the information to the scheduler about what resources are still available on the host. Hardware profiles tell the system how many resources on a specific host are allowed to be used for scheduling and running virtual machines.
To create a new hardware profile, click the Create New Hardware Profile button at the top right panel.
Type the following details:
- The Realm
- Name of Hardware Profile
- Description
- Cores & Max Memory (RAM capacity)
- Device name
- ID
- Quantity
Click .
Hardware Profiles have the following actions.
| Action | Notes |
|---|---|
| Delete | A user can delete a hardware profile. |
| Edit | A user can edit a hardware profile. |
Libvirt Storage Pools
There are different tiers of Libvirt Storage Pools that a user may want to use for their drives such as flash or slower spindle. Libvirt Storage pools is the interface that allows fast or slow types of drives to be created.
To create a new Libvirt Storage Pool, click the Create New Libvirt Storage Pool button at the top right panel.
Type the following details:
- The Realm
- Name of the storage pool
- Type of volumes stored in the pool:
- Drives
- Hardware Setups
- Raw Volumes
- Images
- ISOs
- Default or non-default state for storing drives
- Location in VM host filesystem
- Location in Backend host filesystem
Location in VM & Backend host filesystems must exist and allow the tiCrypt user to write. Failure to do so will result in unusable storage pools.
Click .
| Action | Notes |
|---|---|
| Delete | A user can delete a Libvirt storage pool. |
| Edit | A user can edit a Libvirt storage pool. |
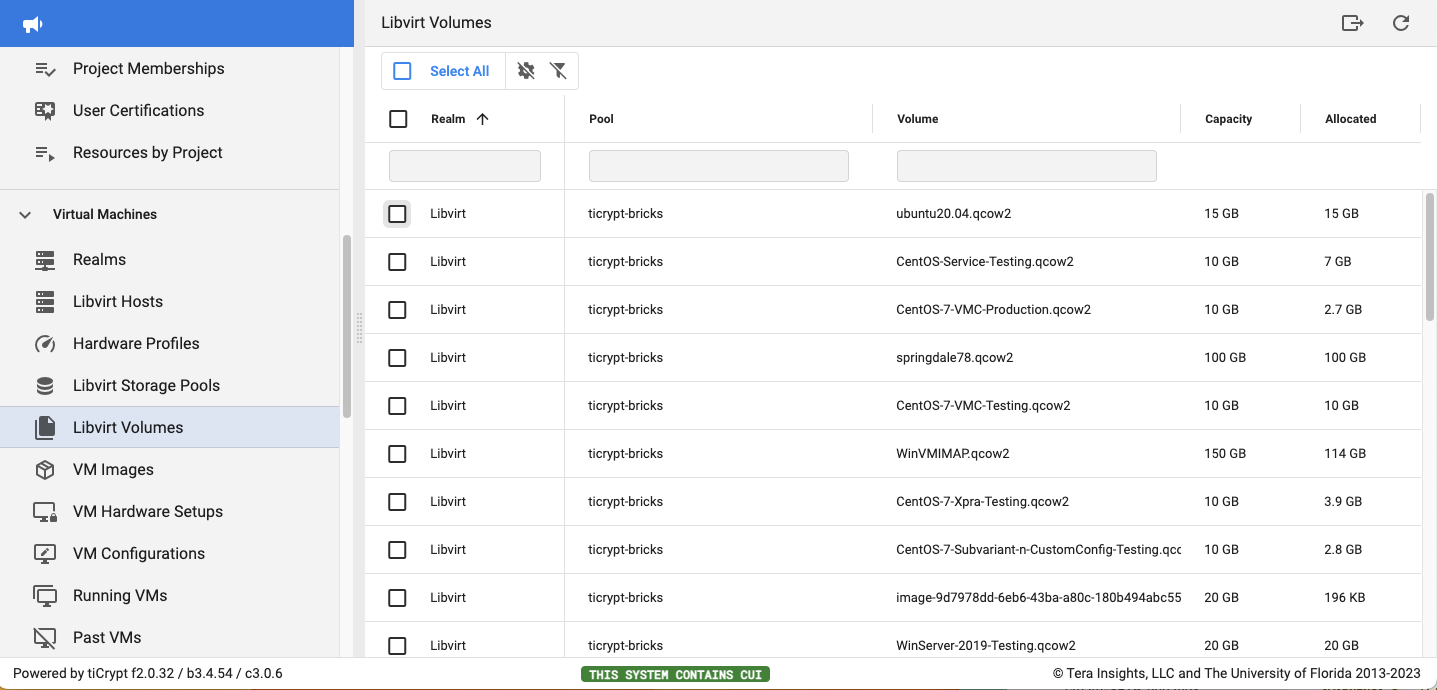
Libvirt Volumes
The Libvirt Volumes are essentially the "disk" where the operating system lives. Users cannot populate the volume tab through tiCrypt. Rather, the system backend communicates with the host and requests all of the volumes that have been integrated into the system.
VM Images
The VM Images are fully configured virtual machines files that are used during deployment. A virtual machine defines the Realm, the volume, and the operating system. When defining the OS upon creating an image, the OS MUST match the OS that is associated with the Volume.
For each Volume, there can only be one VM Image.
To create a new VM Image, click the Create New VM Image button at the top right panel.
Type the following details:
- The Libvirt volume for the VM Image
- Name of the VM Image
- Operating System
- Brief Description
Click .
| Action | Notes |
|---|---|
| Delete | A user can delete a VM Image. |
| Clone | A user can clone a VM Image. |
| Edit | A user can edit a VM Image. |
VM Hardware Setups
The Hardware Setups are configuration setup templates for virtual machines. They specify the following:
- Realm the VM will use
- Virtual machine image
- Number of cores
- Amount of memory (RAM)
- List of devices such as GPUs/FPGAs
- Debug options such as pty and console
- Creator of the hardware setup
To create a new VM Image, click the Create New Hardware Setup button at the top right panel.
Type the following details:
- The Image for the Hardware Setup
- Cores & Maximum Memory (must be at least 1 GB)
- Video type
- Devices
- Name
- Optional Description
- Team(s)
- User(s)
- Usage Instructions
Click .
Applying quotas to hardware setups is optional. However, it is recommended to apply quotas for good practice.
The actions that can be done on a hardware setup are as follows:
| Action | Notes |
|---|---|
| Edit | A user can edit the components of the hardware setup. |
| Clone | A user can clone an existing hardware setup. |
| Simulate allocation | A user can simulate how the scheduler would land on the host. This is commonly used for debugging. |
| Delete | A user can delete a host. |
VM Configurations
This tab shows all of the VM configurations in the system of both running and shutdown VMs. Virtual machines can be shared, edited, shut down and bulk deleted.
| Action | Notes |
|---|---|
| Share | A user can share VM configurations with other users. |
| Edit | A user can edit the VM configuration basic information,projects, hardware setups and drives. |
| Bulk Delete | A user can bulk delete VM configurations. |
You can edit a VM configuration to a project only if you are part of that project.
You cannot delete a VM configuration that is currently running.
Running VMs
Admins may view all running virtual machines in the system along with the:
- The VM Runtime
- The Owner
- The Associated team
- Whether or not it is a debug machine
- Wether or not is a connected machine
- The VM configuration
- Cores & memory
- VM ID
- Host Server
- IP Address
- MAC Address
If no VM's are running, nothing will appear in this tab.
When a VM is selected, there are a variety of actions that can be done.
| Action | Notes |
|---|---|
| Set Project | A user can assign a new project to the virtual machine if and only if the tag of the new project is a subproject of the parent one. |
| Shutdown | A user can shut down a virtual machine from the management tab. |
| View logs | A user can view the logs pertaining to selected virtual machine. |
| Libvirt XML description | A user can view the Libvirt XML description for the selected virtual machine. |
| Open VNC | A user can open a VNC terminal which is used for running virtual machines in debug mode. This enables admins to login to debug an issue. |
If you own a VM you will notice some additional options similar to the Vault options such as open remote application, transfer files to/from vault, open SFTP pathway, open terminal.
All of these actions can be accessed as seen in the video below.
Past VMs
The Past VMs will show the hundred most recent VMs that have been shut down or that have become inactive. It is very important to view logs if something unexpectedly went down. The only action that can be done here is to view logs.
Service VMs
The Service VMs displays all of the service VMs that exist in the system. Recall that service VMs are VMs that are used for a more harmonious workflow in updating and maintaining virtual machines. Service virtual machines are virtual machines that have minimal restrictions, have access to the internet but do NOT have access to the encrypted drives or the vault. These machines cannot be used for research and they are only available for maintenance by administrators.
Service machines are exclusively used in this tab. They do not exist anywhere else in the system.
To create a new Service VM, click the Create New Service VM button at the top right panel.
Type the following details:
- The VM Image
- Cores & Maximum Memory
- Name of the Service VM
- Brief Description
Click .
The actions that can be done here are as follows:
| Action | Notes |
|---|---|
| Restart Controller | A user can edit the basic information about a host. |
| Shutdown | A user can shutdown a virtual machine. |
| Delete | A user can delete a virtual machine. |
| Edit | A user can edit information about the VM such as cores, memory, etc. |
| Open VNC | A user can open a VNC terminal . |
| Power up | A user can turn on the VM. |
Drives
The Drives display all drives that exist in the system.
For each drive, the name, owner, team, drive ID, drive size, drive format, backup, type and storage pool are displayed.
A Drive has the following actions.
| Action | Notes |
|---|---|
| Transfer ownership | A user can transfer ownership of the drive to another user. |
| Unshare with everyone | A user can unshare a drive with everyone. |
| Delete | A user can delete a drive. |
| Edit | A user can edit information about the VM such as cores, memory, etc. |
| Open project | A user can open a VNC terminal . |
| Share | A user can share a drive. |
In order to transfer ownership of a drive, the owner must explicitely share the drive with you read-and-write. This rule applies to all user roles in tiCrypt.
The way that the drives work is as follows.
When a user creates a drive, it is encrypted using their public key, and another key that the system generates called a symmetric key. This information is sent and lives on the server. If a user would like to share access of the drive with another user, their private key is used to decrypt the symmetric key. Using the receiver's public key, a version of the symmetric key is created, and another "chunk" of information is sent to the server.
The cryptography used for the drives prevents any type of admin in the system from simply granting themselves access to a drive and taking them over. Only users who were added to or created a drive can access them.
ISO Images
The ISO Images display all images that are uploaded in the system.
For each ISO image, the name, realm, owner, file, team, wether is bootable or has a service, readers and tokens are displayed.
This tab is used only to view and upload ISO Images.
To upload an ISO Image, click the Upload ISO button at the top right panel.
Next select and type the following details:
- The Realm
- Drag-and-drop the ISO file
- Name of the ISO Image
- Description
- Wether the ISO will be bootable
- Team(s)
- User(s)
Click .
Licensing Servers
The Licensing Servers allow users to add IP addresses that all of the virtual machines can connect to. These servers allow you to create entries that get placed in an allowed list that all VMs can access when running. This may be used to contact licensing servers for software.
| Action | Notes |
|---|---|
| Create | A user can edit the basic information about a host. |
| Re-sync | A user can shutdown a virtual machine. |
| Export CSV | A user can edit information about the VM such as cores, memory, etc. |
| Delete | A user can delete a virtual machine. |
To create a new Licensing Server, click the Create New Licensing Server button at the top right panel.
Type the following details:
- The Servers domain name (or IPv4 Address)
- The ports number
- Protocol (TCP or UDP)
- Optional Group
- Deactivation date
Click .
You can re-sync rules of the server by clicking the Resync Rules button in the top right panel.